
PalmCare User Guide: Even Beginners Can Quickly Get Started (Part 1)
Palm ultrasound, this is the correct way to use it.
In the front lines of clinical diagnosis and treatment, time is of the essence, and precision is the guarantee. When traditional ultrasound equipment is limited by size, operational barriers, and diagnostic efficiency, a portable diagnostic tool that breaks free from these constraints and integrates intelligent technology is becoming a "third eye" for medical professionals. E-Sound Micro-Nano, deeply rooted in the innovation of ultrasound transducers, has deeply embedded AI technology into imaging systems to create handheld ultrasound devices that combine portability, precision, and intelligence, injecting new momentum into medical diagnosis, surgical assistance, and long-term monitoring.
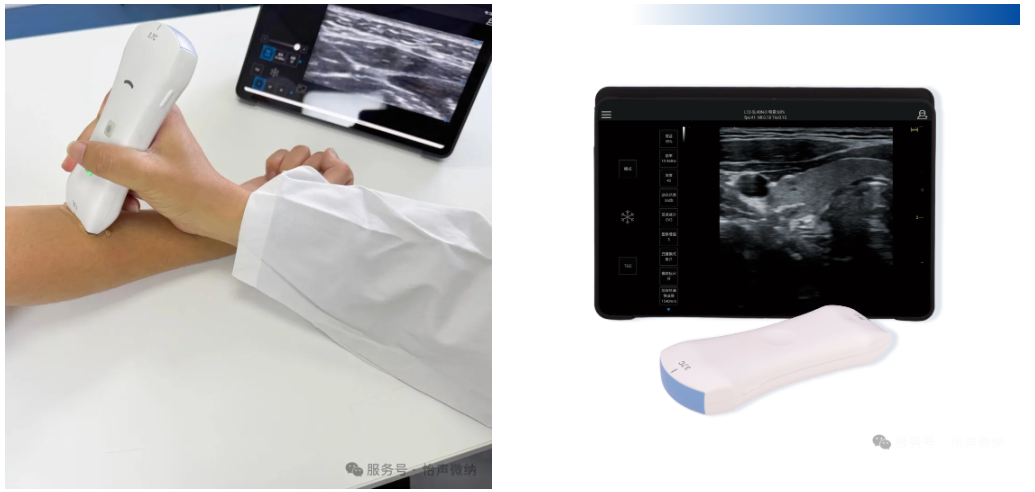
User Interface
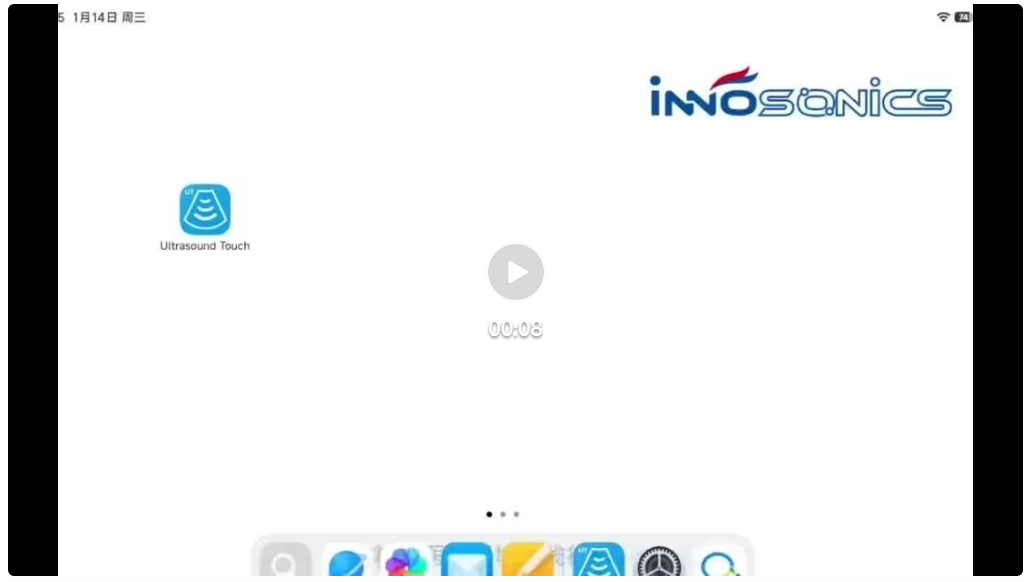
① Power button – Single button on the side of the PAD
② Open the PalmCare APP
③ Search for and connect the probe
④ Select the probe: Linear array or convex array
B Mode
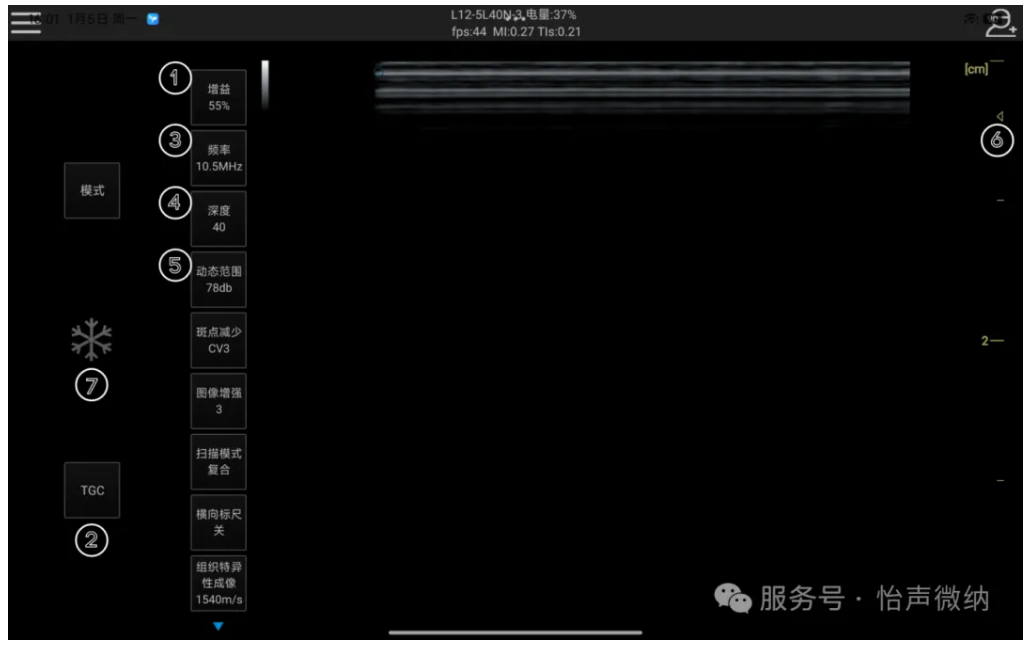
① Gain – Increases overall image brightness
② TGC – Adjusts brightness at different depths
③ Frequency – Adjusts according to different depths; low frequencies offer better penetration, high frequencies offer higher resolution
④ Depth – Adjusts the depth of view
⑤ Dynamic Range – Decreasing this increases visual contrast, increasing it increases image saturation
⑥ Small Focus – Slide your finger up and down over the focus area to adjust the image's focus region
⑦ Freeze Button – Freezes the image
Color Doppler Mode
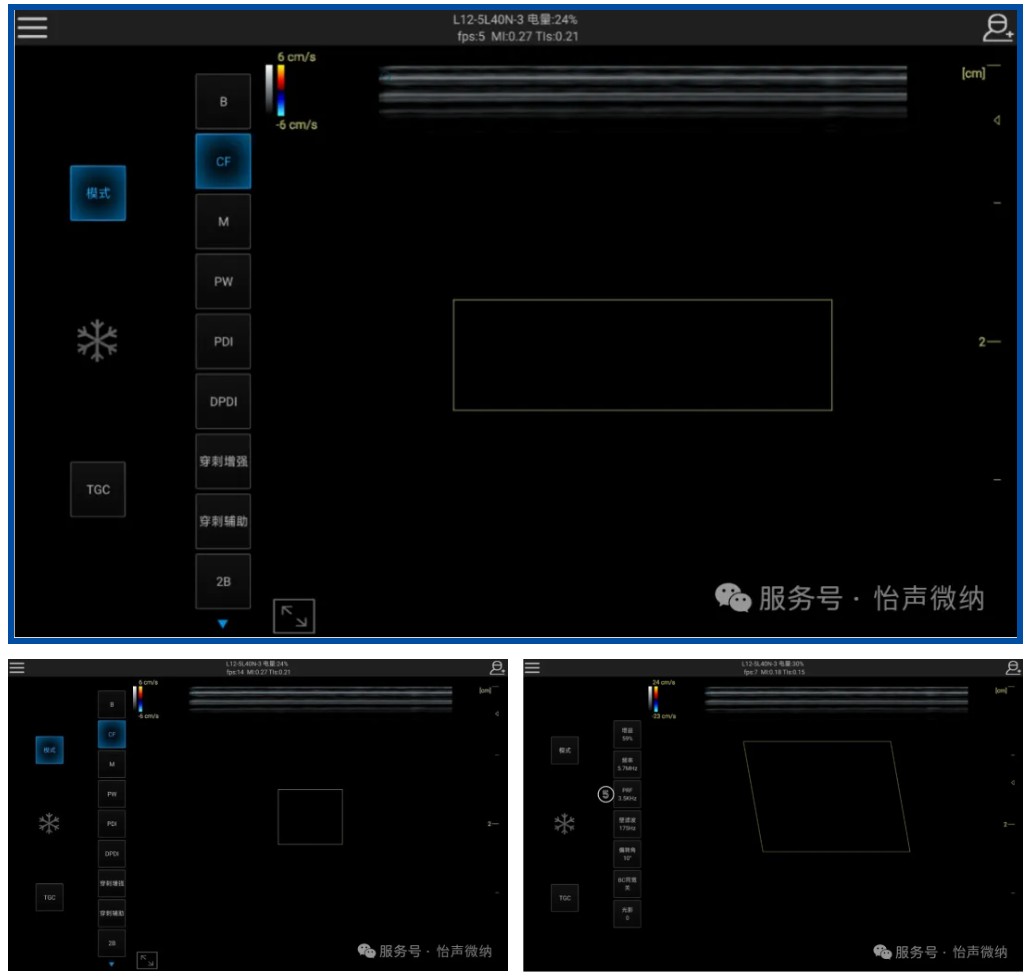
① Mode CF – Activate color mode
② Sampling frame size adjustment
③ Sampling frame position adjustment
④ Gain – Amplify blood flow signal and display blood flow
⑤ PFR – Decreasing it can detect low-velocity blood flow, increasing it can prevent high-velocity blood flow from mixing with the flow.

